A D365 F&O workspace is a centralized hub within Dynamics 365 Finance and Operations that consolidates commonly used links, tiles, lists, and tasks specific to a user’s role.
In this blog, we will show how to create a workspace in Dynamics 365 for Finance and Operations. We will also explain how to make personalized views with dynamic filters and add them to the workspace to display the necessary KPIs.
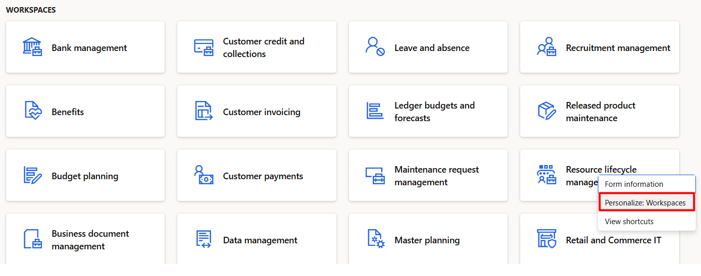
The process starts by right-clicking on the default dashboard in the Workspace area. Then, click on “Personalize: Workspaces”
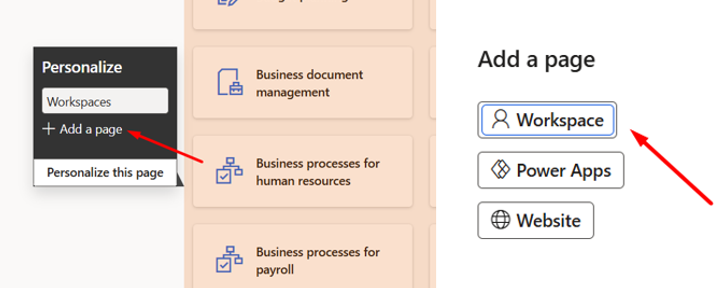
In the pop-up that appears, the next step is to click on “Add a page” and then select “Workspace“.
Next, enter the name you want to use as the workspace title. In this demo, we will name it “Sales orders created today.”
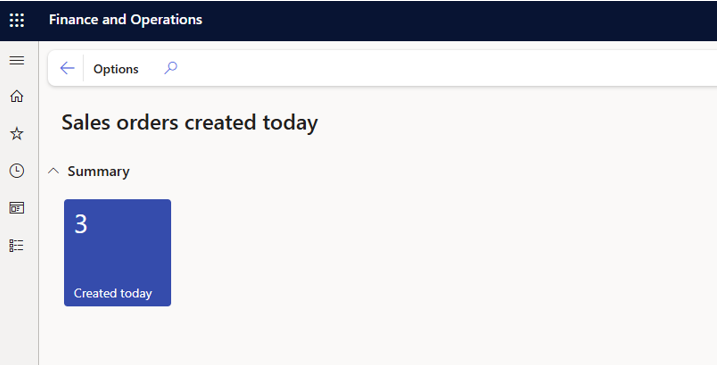
Once the workspace is successfully created, it will appear alongside other existing workspaces. Click on it, and you should be able to see its content.SS
At this point, the workspace will be empty because nothing has been added yet. The next step is to personalize a form. In our demo, we will use the “All Sales Orders” form. The goal is to add a personalization with a dynamic filter to the workspace and display the count of records as a tile.
Navigate to Sales and Marketing > Sales Orders > All Sales Orders.
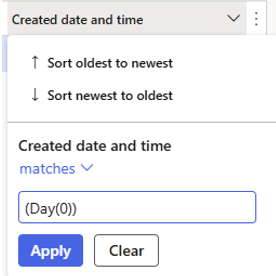
Personalize the form by adding the field “Created Date and Time”. Apply a filter on the grid using Day(0). This filter ensures that only the orders created on the same day the form is opened are displayed. There are also many other dynamic filters available, which you can explore using this link.
After successfully applying the Created Date and Time filter, save the personalized view. Then, add it to the previously created workspace.
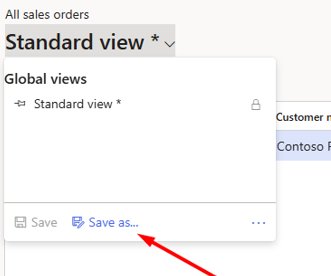
Once you click on “Save as“, enter the title and description for the view. Then, using the Action Pane, click Options > Personalize > Add to Workspace.
Select the previously created workspace, choose the necessary presentation, which is Tile in our demo, and then click Configure. Finally, click Add to Workspace.

To test the outcome, navigate to the default dashboard and access your workspace.
In conclusion, workspaces in D365FO are beneficial because they provide a personalized and efficient way to access and monitor key data. By allowing users to customize views, apply dynamic filters, and display relevant KPIs through tiles, workspaces streamline workflows and enhance decision-making.